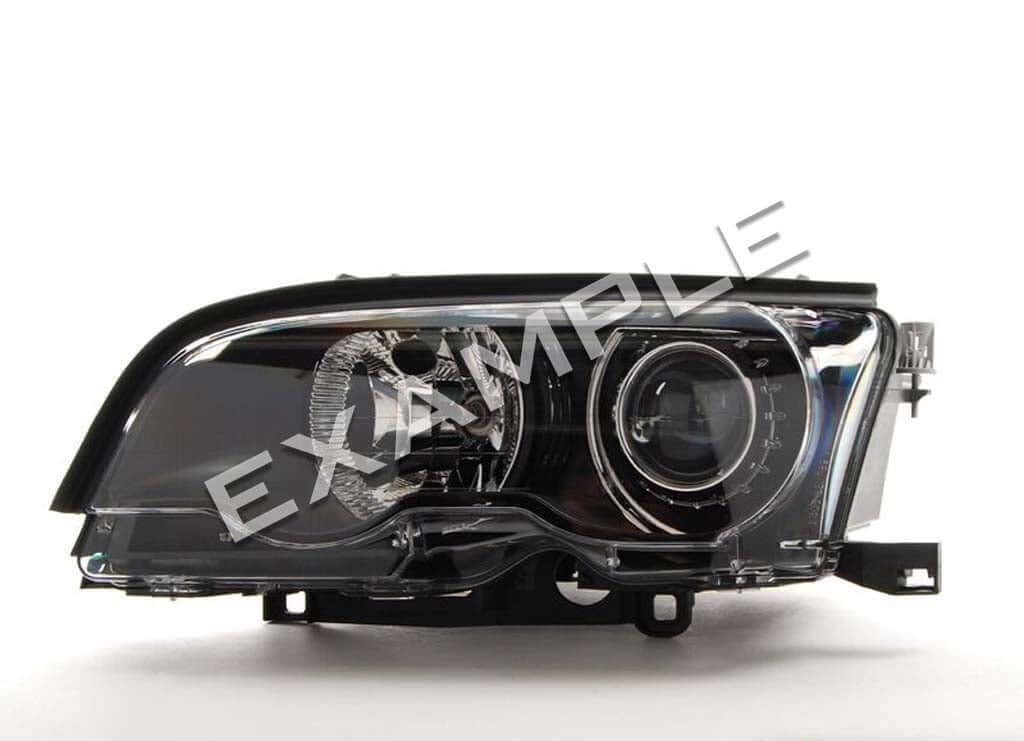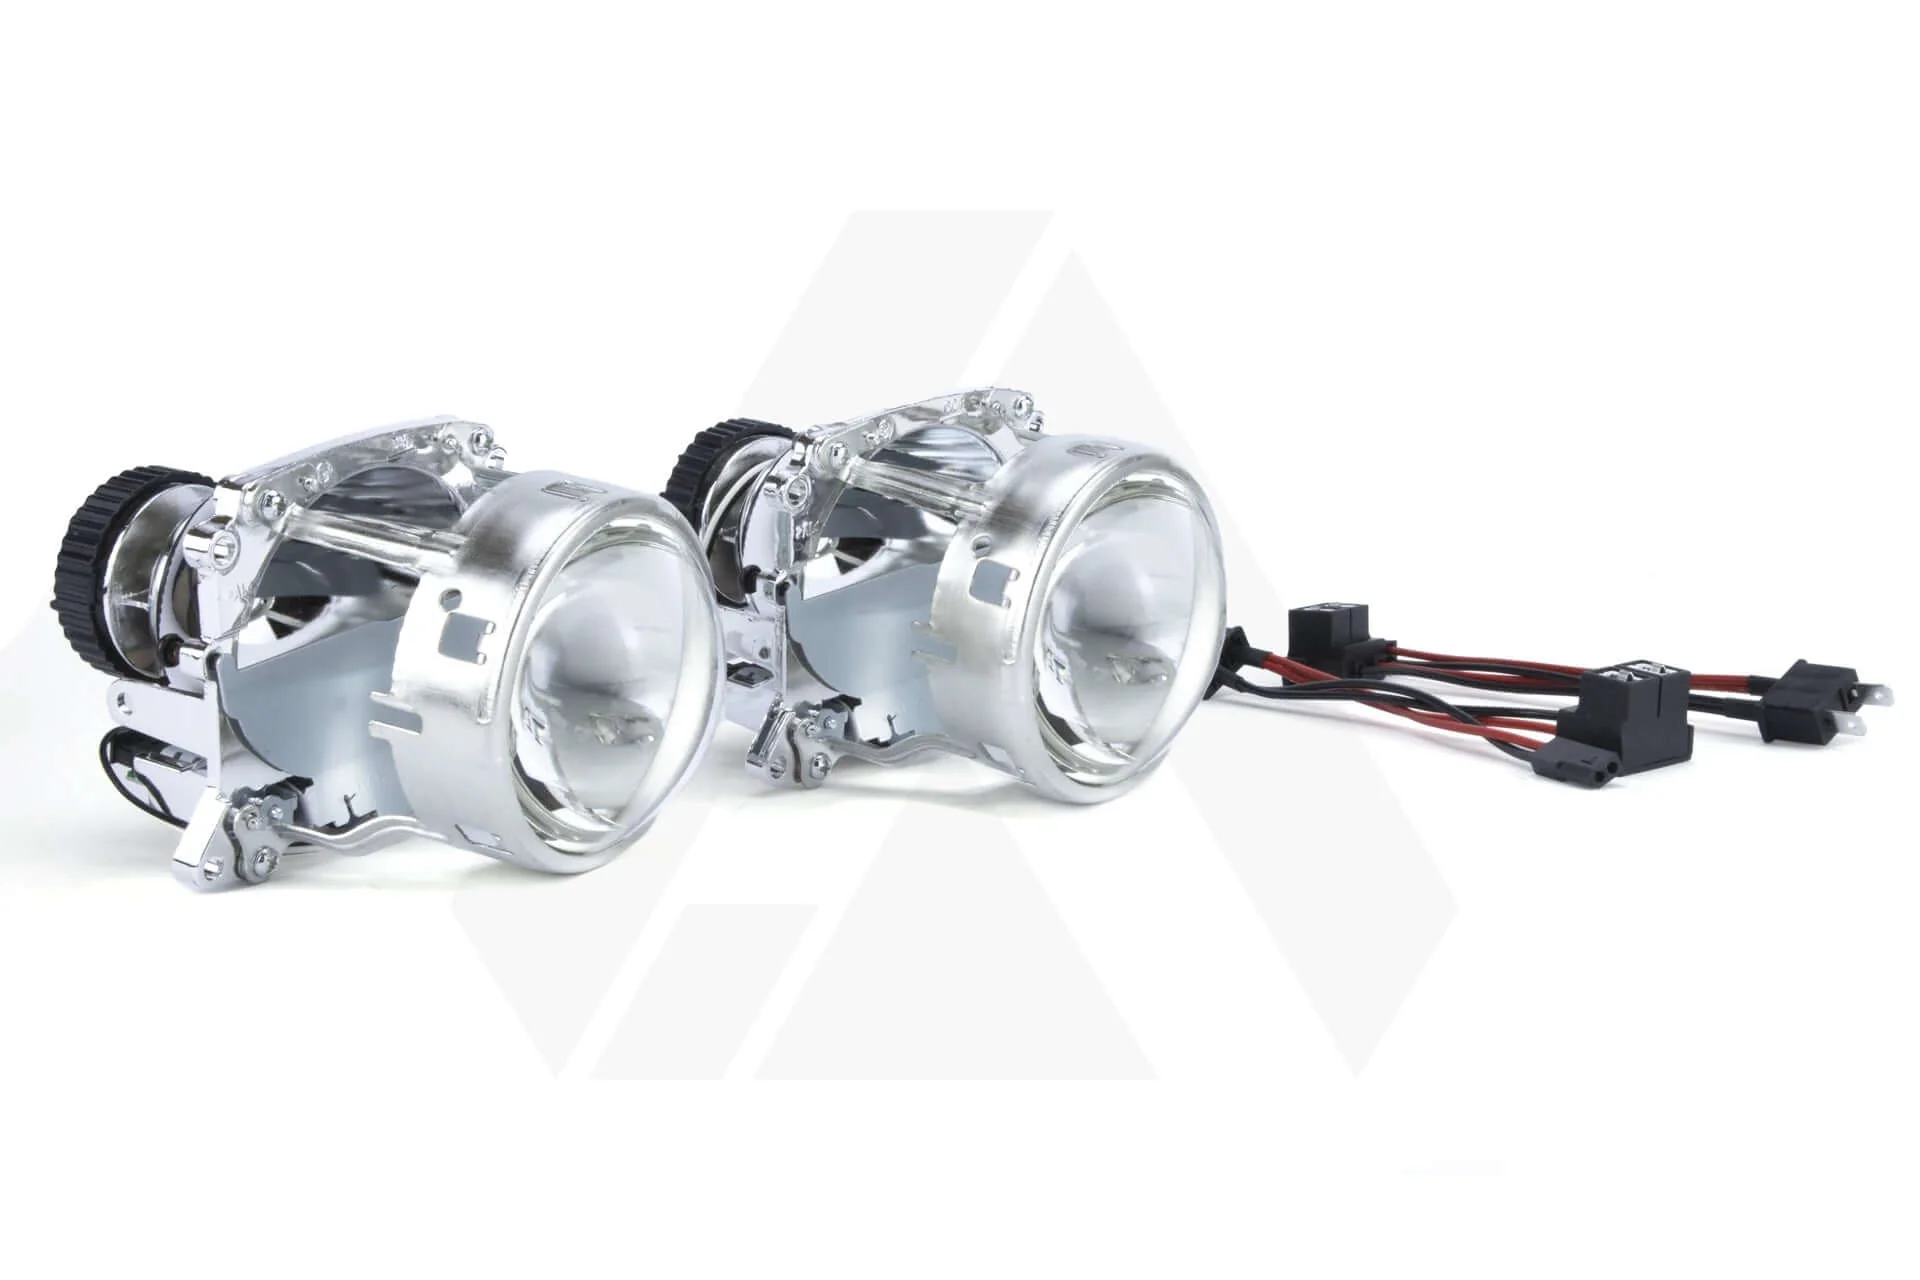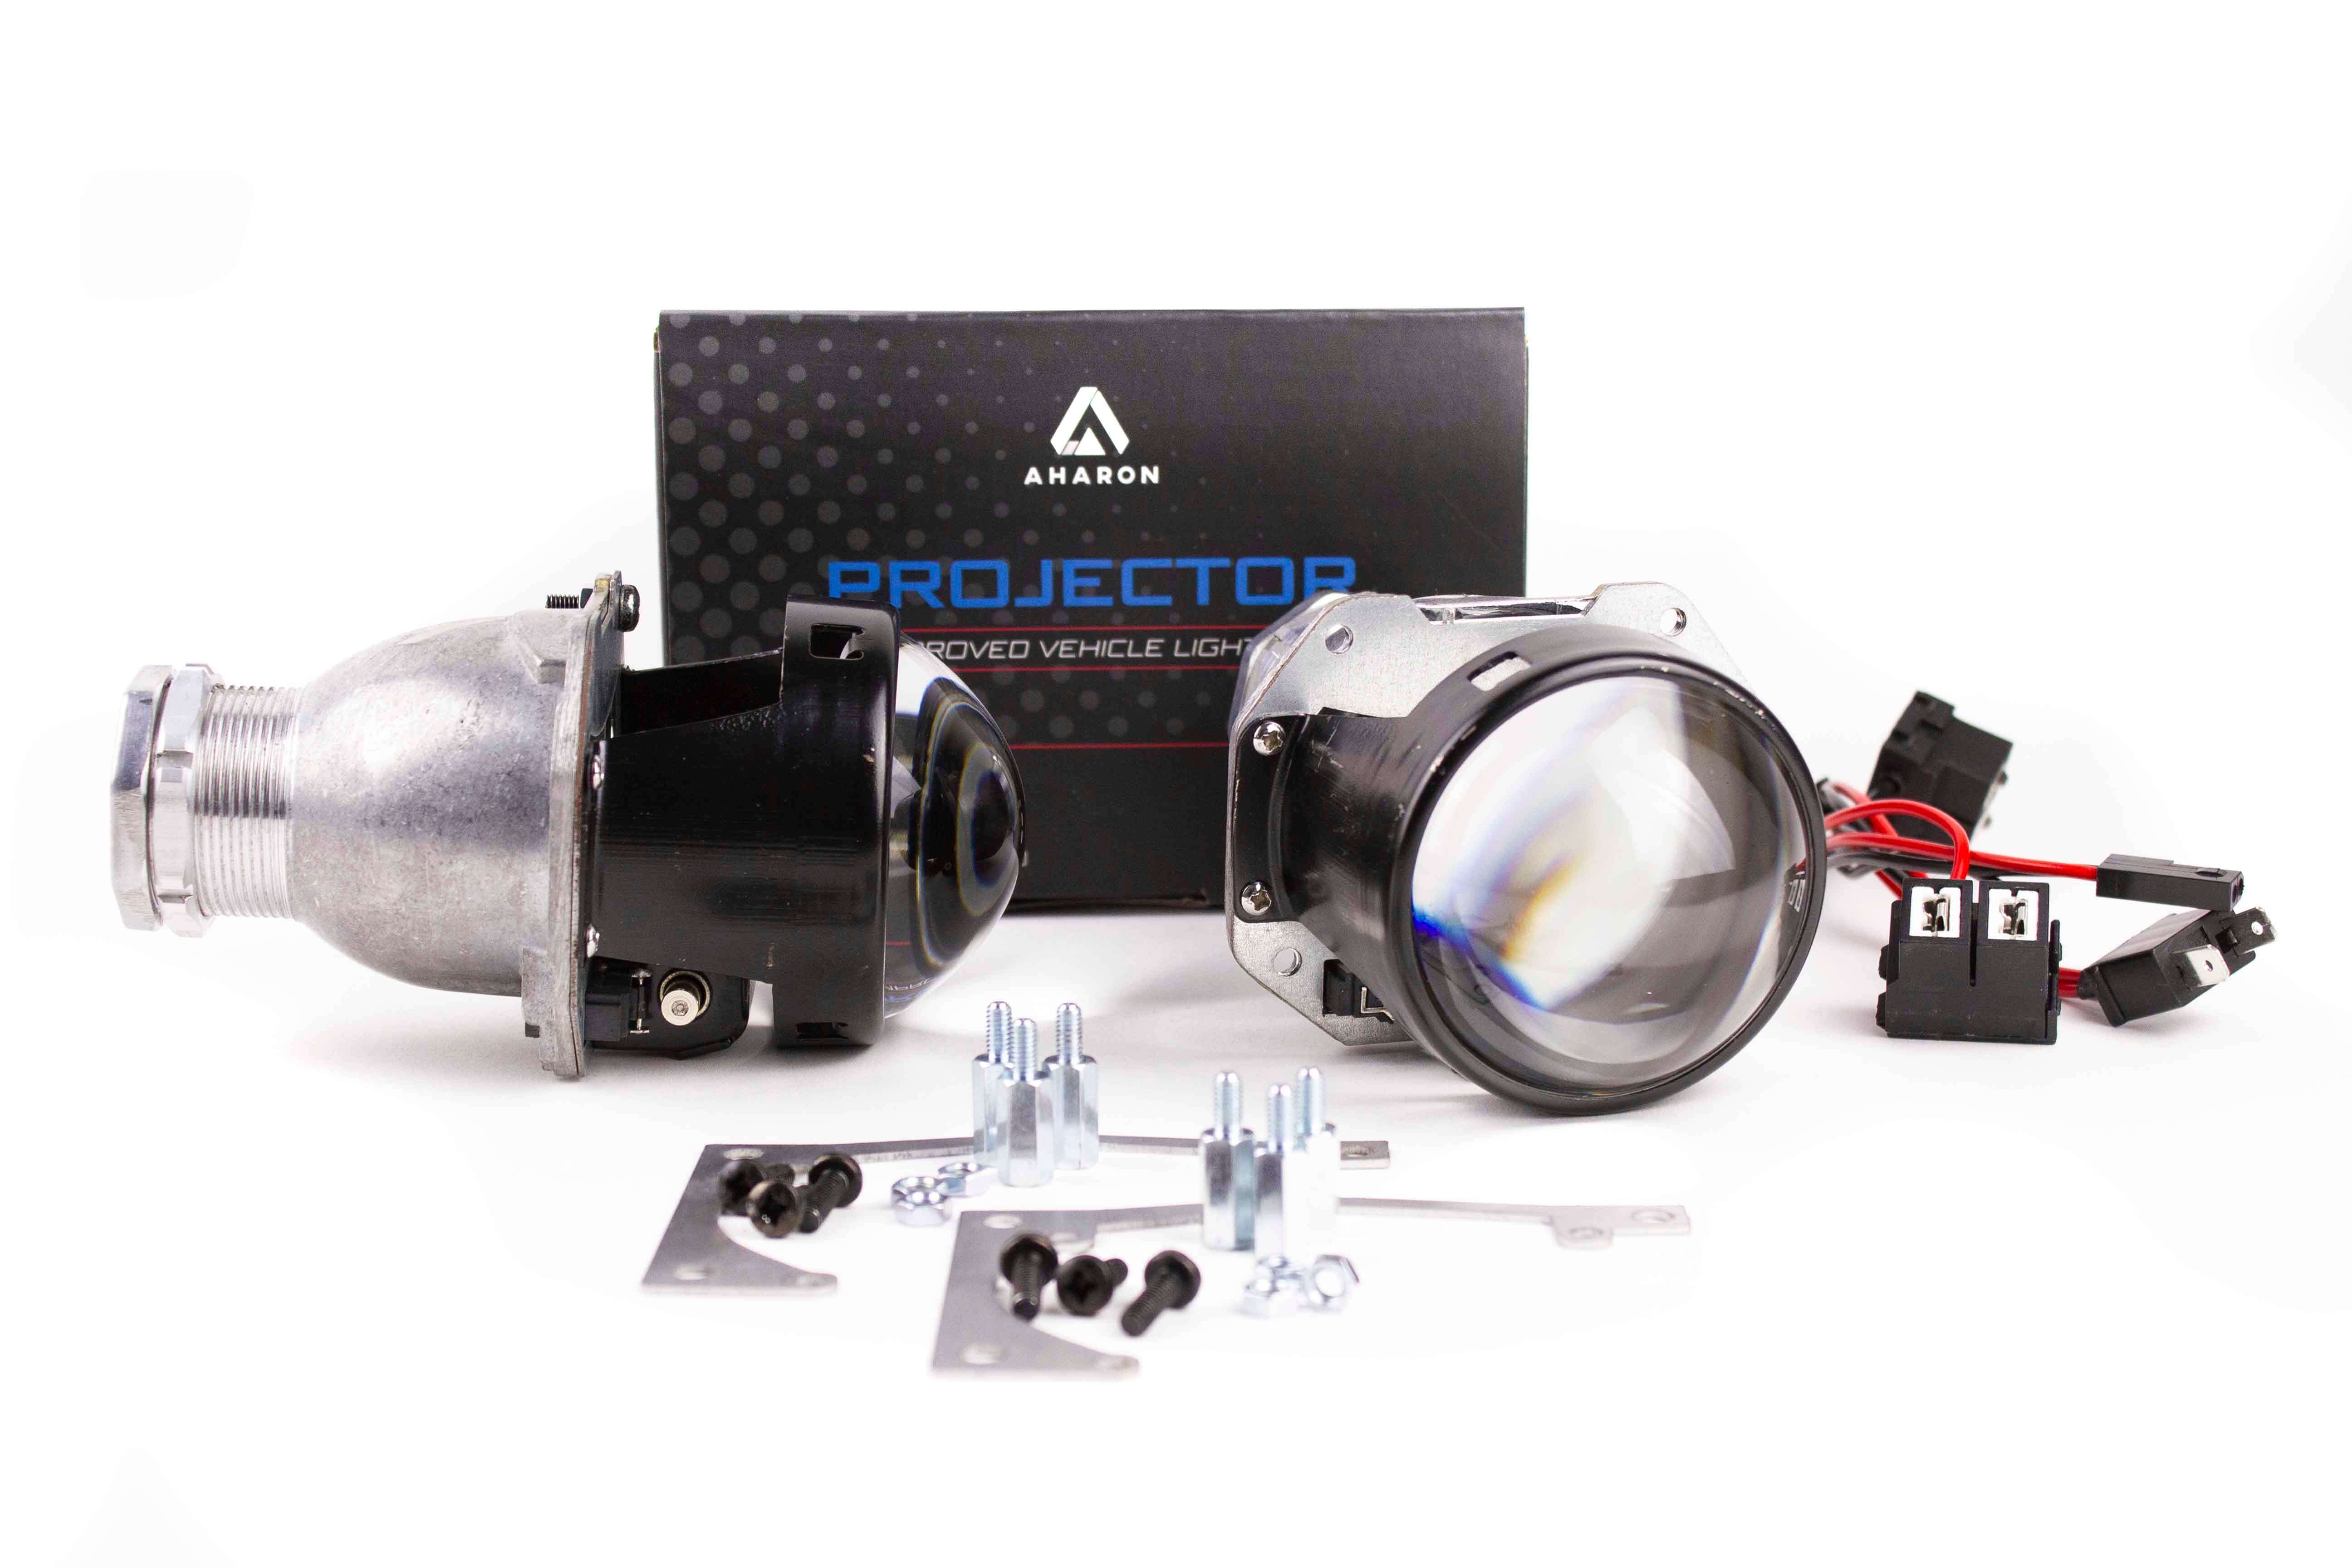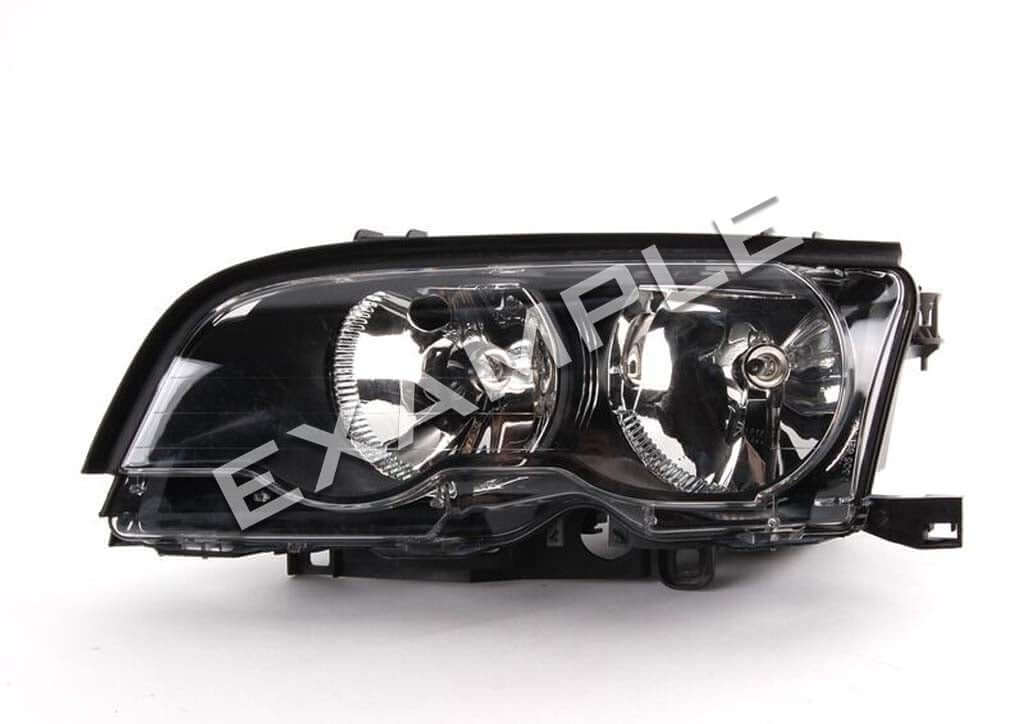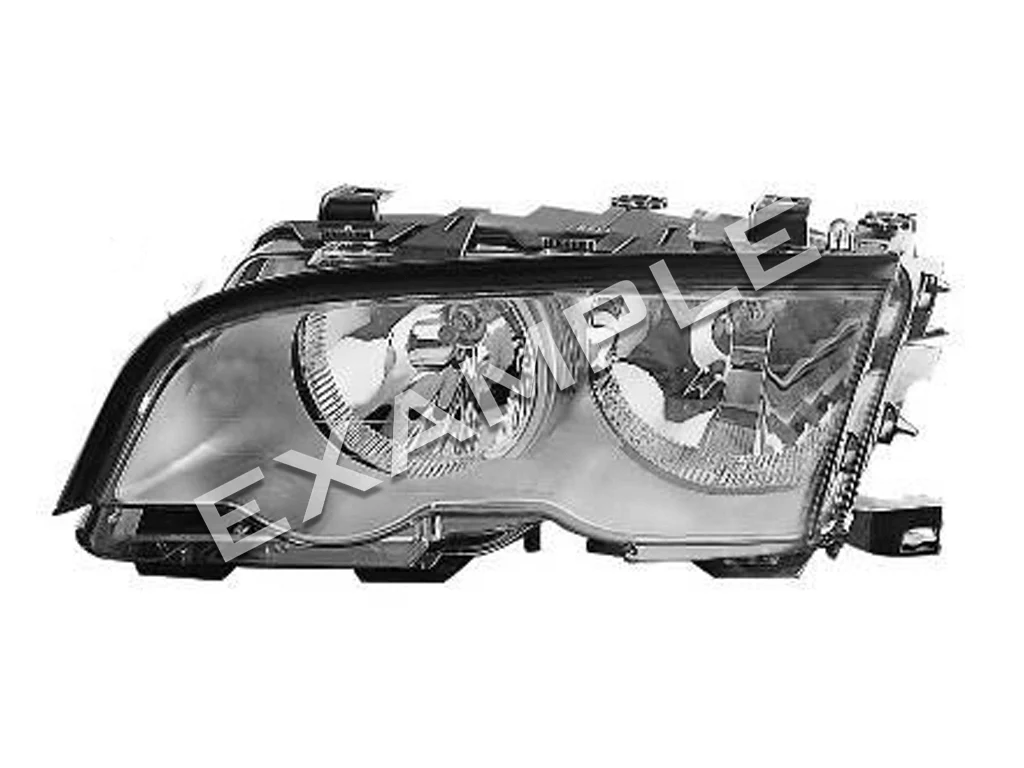
BMW 3 E46 98-05 bi-xenon headlight repair & upgrade kit for bi-xenon HID headlights made by ZKW
BMW 3 E46 98-05 bi-xenon headlight repair & upgrade kit for bi-xenon HID headlights made by ZKW
Installation
This is an easy retrofit that even complete novices can do, but those with more skills and experience will be quicker. Discounting removal and replacement of the headlights, you could expect the job to take anything from less than one to two hours.
You have to open the headlights, but with the E46 headlights, that's only a matter of opening the clips. and replace it with your upgraded projector. Done.
Customer video with a lot of info;
https://youtu.be/07D5xNIFmVo?si=JowV49uD3Vm5DiRh
When you fit new headlight lenses, you can’t just reuse that crusty old rubber seal—swap it out for butyl. Here’s why:
-
Compensates for imperfect fit
Aftermarket or reproduction lenses almost never match OEM tolerances exactly. Butyl fills in any tiny gaps or misalignments, ensuring a snug seal even if the new lens isn’t a perfect fit in the housing. -
Longer lifespan
Butyl won’t dry out or become brittle in extreme temperatures. It’ll keep its seal through heat, cold and everything in between—so you’re not chasing leaks every year. -
Easy to apply
Just heat it up a bit, stretch it out, press it into the groove where the lens sits, install your new lens, and you’re done. No messy solvents, no worries about gaps.
Bottom line: new lenses don’t sit 100% snug, and old rubber seals lose their mojo over time. Replacing that crusty gasket with fresh butyl when you install new headlight lenses is the simplest way to keep them clear, dry and firmly in place.
FAQ and DIY information
For general installation and DIY information, please check our FAQ and/or DIY pages.
FAQ for frequently asked questions, and answers :-), about products, product information ordering, shipping, returns, warranty, etc. You can find the FAQ PAGE HERE
DIY for Do It Yourself information about installation, product details etc. You can find the DIY PAGE HERE
Professional installation
This complete kit has been especially developed to enable retrofitting at home, saving you the cost of installation. However, should you prefer to have the kit installed by a professional? Check out the LIST OF DEALERS / INSTALLERS
Please note that, for professional retrofits, you should order your Retrofitlab kit or parts directly from the workshop in question (it saves you money on shipping).
Disclaimers
These products are not ECE or DOT/FMVSS108 approved and must not be used on public roads in any exterior application. Use on public roads will invalidate both the operating license and insurance coverage. You can find more info HERE
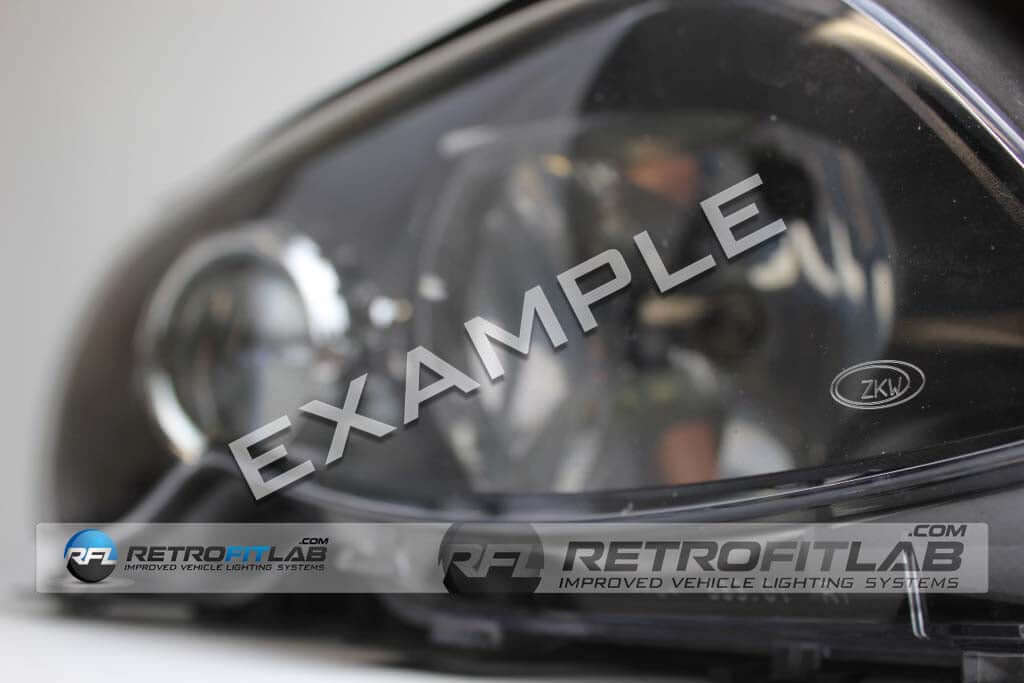
The product images are for illustration purposes only and may not be an exact representation of the product. Actual products may vary due to changes in manufacturing/product enhancements. You can find more info HERE
This video is unfortunately not up-to-date.
The process to mount the new projector is improved. Please see the installation manual in the description tab.
This customer video is intended to provide a general idea of the output and light pattern from a projector retrofit. It does not necessarily represent the exact setup in this product/kit, it's made with the Optimus TR mini with Osram bulbs
Original: $175.71
-70%$175.71
$52.71More Images
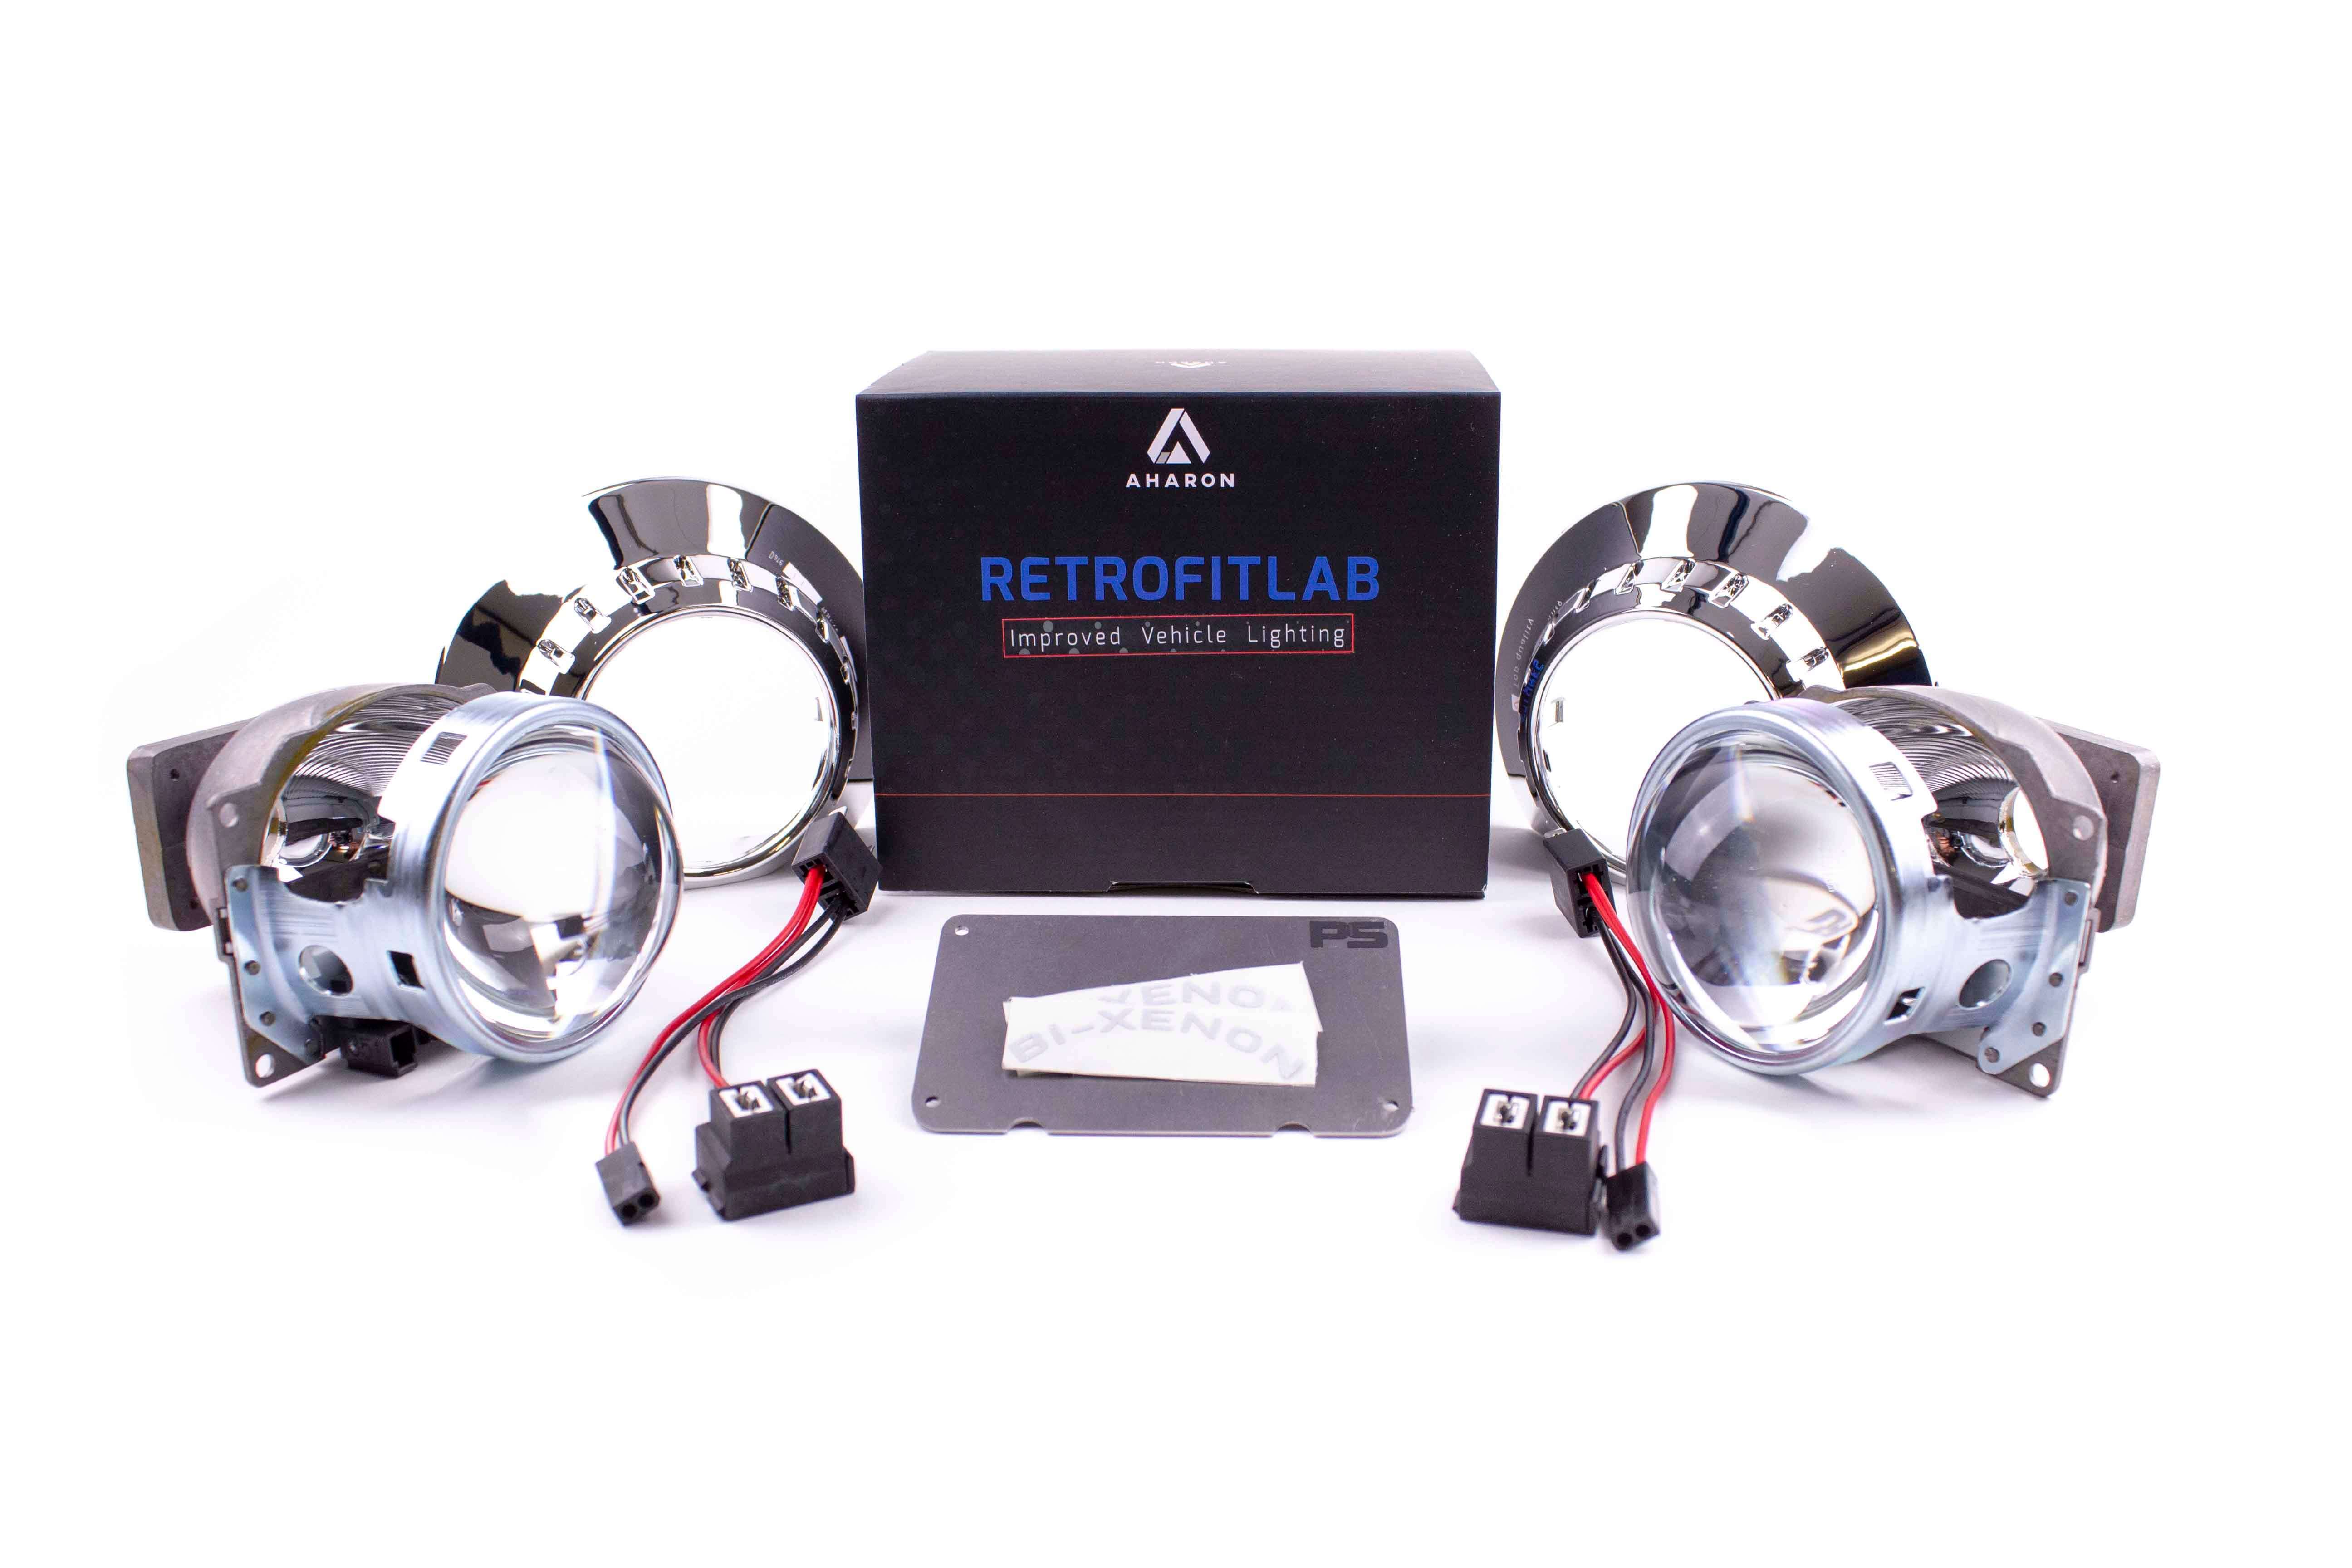
BMW 3 E46 98-05 bi-xenon headlight repair & upgrade kit for bi-xenon HID headlights made by ZKW
Installation
This is an easy retrofit that even complete novices can do, but those with more skills and experience will be quicker. Discounting removal and replacement of the headlights, you could expect the job to take anything from less than one to two hours.
You have to open the headlights, but with the E46 headlights, that's only a matter of opening the clips. and replace it with your upgraded projector. Done.
Customer video with a lot of info;
https://youtu.be/07D5xNIFmVo?si=JowV49uD3Vm5DiRh
When you fit new headlight lenses, you can’t just reuse that crusty old rubber seal—swap it out for butyl. Here’s why:
-
Compensates for imperfect fit
Aftermarket or reproduction lenses almost never match OEM tolerances exactly. Butyl fills in any tiny gaps or misalignments, ensuring a snug seal even if the new lens isn’t a perfect fit in the housing. -
Longer lifespan
Butyl won’t dry out or become brittle in extreme temperatures. It’ll keep its seal through heat, cold and everything in between—so you’re not chasing leaks every year. -
Easy to apply
Just heat it up a bit, stretch it out, press it into the groove where the lens sits, install your new lens, and you’re done. No messy solvents, no worries about gaps.
Bottom line: new lenses don’t sit 100% snug, and old rubber seals lose their mojo over time. Replacing that crusty gasket with fresh butyl when you install new headlight lenses is the simplest way to keep them clear, dry and firmly in place.
FAQ and DIY information
For general installation and DIY information, please check our FAQ and/or DIY pages.
FAQ for frequently asked questions, and answers :-), about products, product information ordering, shipping, returns, warranty, etc. You can find the FAQ PAGE HERE
DIY for Do It Yourself information about installation, product details etc. You can find the DIY PAGE HERE
Professional installation
This complete kit has been especially developed to enable retrofitting at home, saving you the cost of installation. However, should you prefer to have the kit installed by a professional? Check out the LIST OF DEALERS / INSTALLERS
Please note that, for professional retrofits, you should order your Retrofitlab kit or parts directly from the workshop in question (it saves you money on shipping).
Disclaimers
These products are not ECE or DOT/FMVSS108 approved and must not be used on public roads in any exterior application. Use on public roads will invalidate both the operating license and insurance coverage. You can find more info HERE
The product images are for illustration purposes only and may not be an exact representation of the product. Actual products may vary due to changes in manufacturing/product enhancements. You can find more info HERE
This video is unfortunately not up-to-date.
The process to mount the new projector is improved. Please see the installation manual in the description tab.
This customer video is intended to provide a general idea of the output and light pattern from a projector retrofit. It does not necessarily represent the exact setup in this product/kit, it's made with the Optimus TR mini with Osram bulbs
Product Information
Product Information
Shipping & Returns
Shipping & Returns
Description
Installation
This is an easy retrofit that even complete novices can do, but those with more skills and experience will be quicker. Discounting removal and replacement of the headlights, you could expect the job to take anything from less than one to two hours.
You have to open the headlights, but with the E46 headlights, that's only a matter of opening the clips. and replace it with your upgraded projector. Done.
Customer video with a lot of info;
https://youtu.be/07D5xNIFmVo?si=JowV49uD3Vm5DiRh
When you fit new headlight lenses, you can’t just reuse that crusty old rubber seal—swap it out for butyl. Here’s why:
-
Compensates for imperfect fit
Aftermarket or reproduction lenses almost never match OEM tolerances exactly. Butyl fills in any tiny gaps or misalignments, ensuring a snug seal even if the new lens isn’t a perfect fit in the housing. -
Longer lifespan
Butyl won’t dry out or become brittle in extreme temperatures. It’ll keep its seal through heat, cold and everything in between—so you’re not chasing leaks every year. -
Easy to apply
Just heat it up a bit, stretch it out, press it into the groove where the lens sits, install your new lens, and you’re done. No messy solvents, no worries about gaps.
Bottom line: new lenses don’t sit 100% snug, and old rubber seals lose their mojo over time. Replacing that crusty gasket with fresh butyl when you install new headlight lenses is the simplest way to keep them clear, dry and firmly in place.
FAQ and DIY information
For general installation and DIY information, please check our FAQ and/or DIY pages.
FAQ for frequently asked questions, and answers :-), about products, product information ordering, shipping, returns, warranty, etc. You can find the FAQ PAGE HERE
DIY for Do It Yourself information about installation, product details etc. You can find the DIY PAGE HERE
Professional installation
This complete kit has been especially developed to enable retrofitting at home, saving you the cost of installation. However, should you prefer to have the kit installed by a professional? Check out the LIST OF DEALERS / INSTALLERS
Please note that, for professional retrofits, you should order your Retrofitlab kit or parts directly from the workshop in question (it saves you money on shipping).
Disclaimers
These products are not ECE or DOT/FMVSS108 approved and must not be used on public roads in any exterior application. Use on public roads will invalidate both the operating license and insurance coverage. You can find more info HERE
The product images are for illustration purposes only and may not be an exact representation of the product. Actual products may vary due to changes in manufacturing/product enhancements. You can find more info HERE
This video is unfortunately not up-to-date.
The process to mount the new projector is improved. Please see the installation manual in the description tab.
This customer video is intended to provide a general idea of the output and light pattern from a projector retrofit. It does not necessarily represent the exact setup in this product/kit, it's made with the Optimus TR mini with Osram bulbs